Friday 28 June 2013

Unit 31 SWOT Analysis

                     A SWOT Analysis, is basically a breakdown of your plans towards achieving your objective be it in business or pleasure, and today I'll be using it as a mixture of both as part of my Specialist Location brief in Unit 31. This SWOT Analysis is basically a simplified breakdown of some of the planning I'd already put forward from my original idea seen HERE , but this page just goes on to explain the Strengths, Weaknesses, Opportunities and Threats as a cross reference to the points I'd already made.

Strengths 


  • A good knowledge of the local area including accessibility, vantage points and ease of parking
  • A love of the outdoors so I wont be fazed by weather conditions although heavy rain could complicate matters
  • An ability to communicate with people on all levels which will come in handy should there be any issues regarding access or security
  • A sense of humour to accompany the previous point
  • A good understanding of how to achieve the best from my camera and equipment which will be a major contributing factor when it comes deciding whether or not I'll be opting for long exposures or not 
  • Determination, if I know I how to commit to something to achieve my desired results, then I will
  • A driving licence and vehicle 
  • Flexibility when it comes to times so I can just drop stuff as and when required if I suddenly feel that now would be a good time to shoot
  • An awareness of my surroundings which means I am unlikely to put myself in to any situations that may be considered stupid or threatening
  • I have a tendency to be able to see the finished image before I actually commence shooting so I'll have a good idea of whether or not I'm getting the images as the time passes and wont be wasting too much time pondering 
Weaknesses

  •  Time management, now although I operate a pretty good system and everything always ends up getting done, I do have a habit of putting things off until the last minute so if I don't get control of this then I could mess up my entire shoot, especially if the weather changes  
  • I can be prone to multi-tasking instead of concentrating on the job in hand I'll try and fit it in with something else which can lead to things not getting the attention they require
  • My attention can wander easily so I can end up getting side tracked from my original idea if something else crosses my mind on location
  • I'm short of money at the moment so my locations need to be in a pretty tight area to reduce fuel costs and if I can get them all done in one journey then even better
  • Mood swings, I have to be in the right frame of mind to just get out of the house and start shooting, but once the bags packed I'm usually ok
  • I can have a tendency to rush things when shooting alone but this could just come from early days when I was shooting street photography and it tends to be more of a case of getting the picture and moving on, I need to calm down a little on that front
  • I'm my own worst critic so I need to think carefully as I fill each frame
Opportunities

  •  As I am aiming to produce a series of images that work together as a set then my initial thought would be to see them exhibited as a set as a fairly good representation of some of my work
  • Potential photographic magazine feature
  • Potential to display locally as an example of industry in the area that people perhaps haven't really taken the time out to look at before
  • Local libraries or exhibition space which I'd have to look into   
  • Sell them as straight prints either individually or as smaller set 
  •  Local press feature and general recognition that I don't travel around with my eyes blinkers on and want to share my observations with others
  • Possibility of commissions from anybody that may appreciate what I do 
Threats

  •  Heavy rain would mean I'd have to rethink my entire shoot especially if there was no let up in the forecast
  • Security issues regarding the possible sensitivity of the area I may be shooting
  • Public intervention be it either nuisance kids or just the general public en mass 
  • Failure to plan ahead properly so empty memory cards and full batteries are a must
  • Traffic problems as in either roadworks or delays which could effect both my accessibility or time scale available
Types of Camera + Large Format Shoot

Camera Obscura - also known in it's simplest form as a pin-hole camera, it basically consists of a light proof box with the exception of a tiny aperture instead of a lens that allows the image to be projected on to a suitable surface with the exposure being controlled by something as simple as a pivoted shutter or even a piece of black tape. The projected image is inverted and the clarity of it is usually dependent on the diameter of the hole.


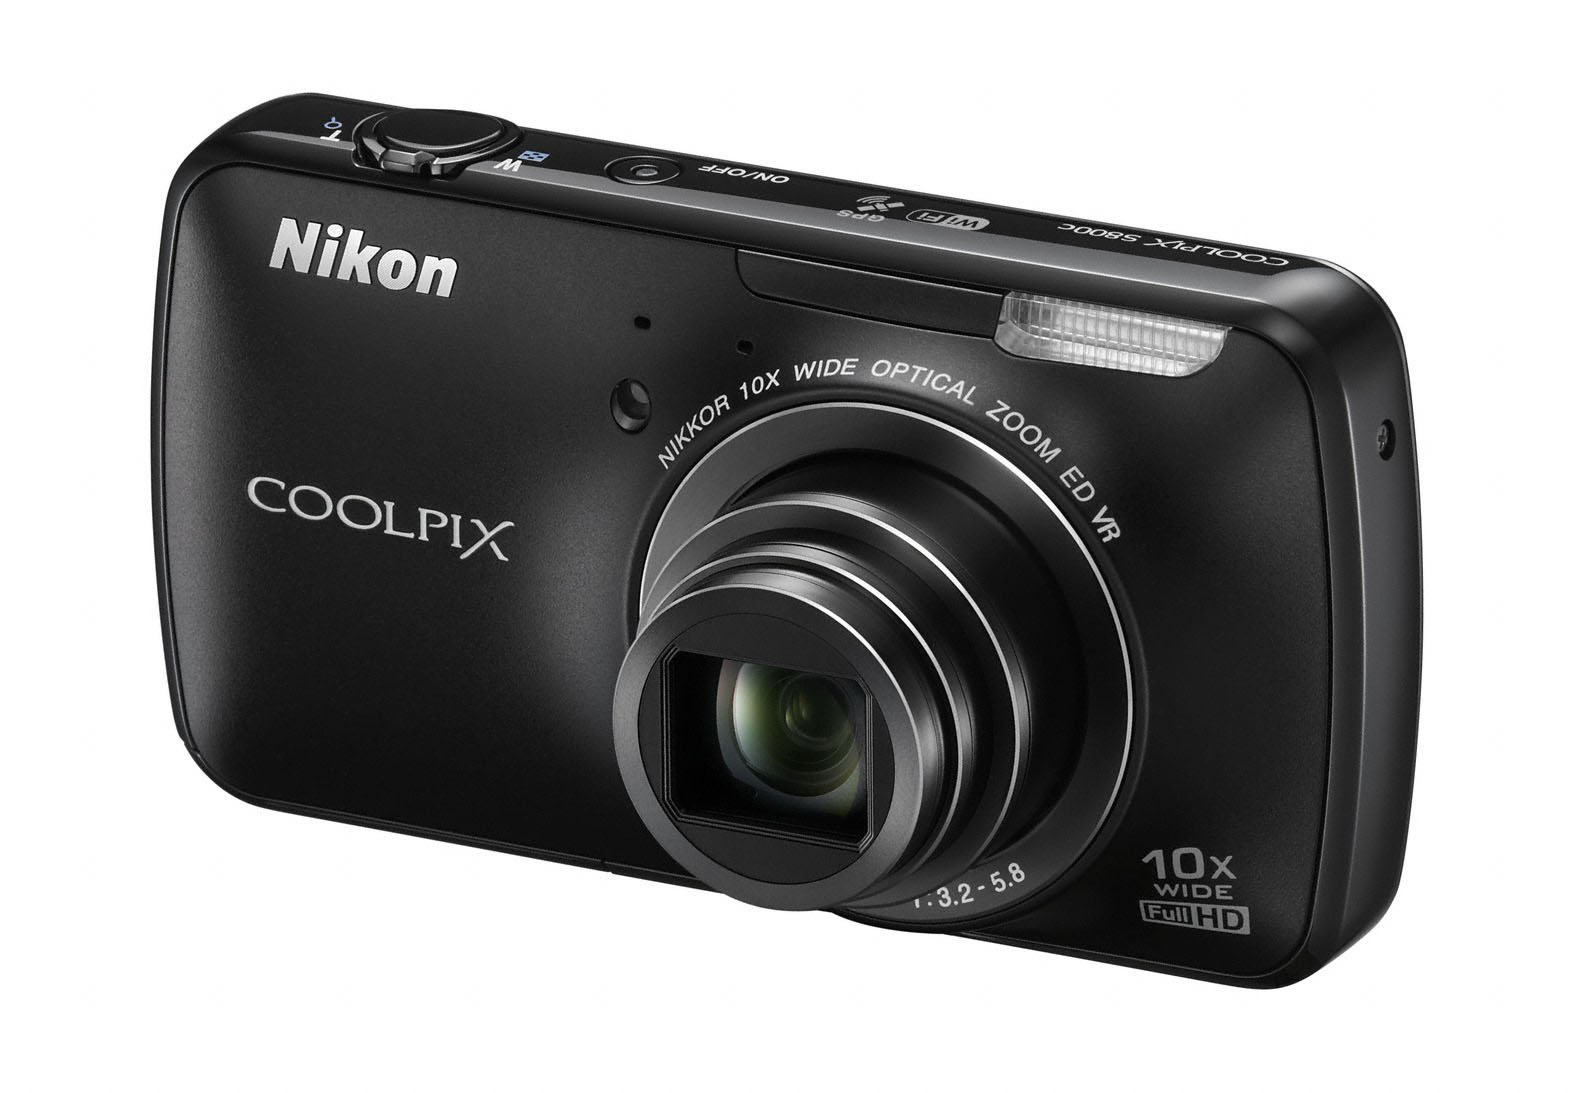
Compacts - available as both digital and film in a variety of sizes and price ranges. The film compacts could anything from 110 film to 35mm  and were usually of a simple 'point and shoot design that was based around simplicity of use although there was always the added excitement of you wondering whether there was ever going to be anything coming back from the processors that was actually worth looking at ...this is of course a personal opinion based on past experience. The digital age brought with it an ever increasing range of possibilities including high speed, low light and even zoom photography and has made such an impact on the industry that the DSLR can find itself left at hope on more than one occasion.


Bridge - offering a stepping stone into the world of RAW and digital SLR photography, firstly by taking on the physical shape and secondly by allowing a good range of macro to zoom photography. Bridge cameras have come along way since their initial introduction.


SLR/DSLR - without going into all the finer details of full frame and cropped sensors etc etc , the dslr is basically the natural progression from the old 35mm single lens reflex camera. They have a flip up mirror that allows the photographer to see exactly what he is planning on shooting through the lens, before releasing the shutter which is when the mirror flips up and allows the image to be captured on either film or sensor. Available in whole host of price ranges with a full range of lenses to suit the purpose and capable of a terrific range of fast action, low light and zoom photography depending on your needs....and wallet.


Twin Lens Reflex - is a medium format camera that takes 120 film and offers a twin lens set up one of which allows the image to project onto the the film whilst the other offers the photographer a view, by way of parallax and the image seen is back to front.


Medium format - again available in both film and digital versions and with digital conversions also available for film formats although they are ridiculously expensive, for now. They also take 120 film but there is no standard image size so the options are there for either 6 x 4.5 cm, 6 x 6 cm and 6 x 7 cm with the width of the image being dependent on the camera. The first thing you will notice about the medium format range is how much the quality of the image improves in the finer details. 


Large format -  producing a negative of 5" x 4", the quality in detail of the large format camera is exceptional especially when blown up. It's basic construction is that of a front plate containing the lens and shutter, then a bellows arrangement to supply the focal length and then a back plate which provides a viewing screen.


                                                       Image courtesy of photo tuts

                    To quote the aforementioned photo tuts " The front and back panels (called ‘standards’) move independently of each other in a series of movements called rise, fall, shift, tilt and swing. This gives the photographer control over converging verticals, the plane of focus and depth of field within the image. Lensbaby products and expensive tilt-shift SLR lenses are attempting to imitate this functionality."
                      Films are loaded as a single sheet into the camera and even though the standard is 5" x 4" the large format camera has and is being explored in it's capabilities by those producing wet plate work using glass and tin types formats. The photographer sets up the camera prior to the insertion of any film plates and has to firstly cock the shutter to allow light through to the ground glass screen and then, working underneath a suitable dark cloth, they will be able to adjust the compostion, focus, aperture and shutter speed , usually in accordance with a suitable light meter reading and reciprocity table (see below). The film is first loaded onto plates in a changing bag to prevent exposure to light and then once the camera is set up the plate can be slipped into place, the shutter cocked and the protective plate over the front of the film can be slipped out. The shutter is best released via a remote hand held device so as to prevent any camera shake, and then once the picture has been taken the protective plate is reinserted but reversed so as to notify the user that the film has been exposed. 
                     A couple of things of note include, different focal lengths require different lenses, increased bellows length is for shallow depth of field or macro, squashed or compressd bellows are for infinity such as landscapes, portrait mode is achieved by simply rotating the rear.


                                Below is a 5" x 4" guide to exposure courtesy of   jaykayphoto

90mm150mm210mmReciprocity
90same1 = 1.5
100+.252 = 3
150+1.5same3 = 5
200+2+.75same4 = 7
250+3+1.5+.55 = 9
300+3.5+2+16 = 12
350+4+2.5+1.257 = 14
400+4.25+2.75+1.758 = 17.5
450+4.5+3.25+29 = 20
500+5+3.5+2.2510 = 24
550+5.25+3.75+2.7511 = 27
600+5.5+4+312 = 31
6505.75+4.25+3.2513 = 34
700+4.5+3.514 = 38
750+4.75+3.715 = 45
800+5+3.916 = 50
850+417 = 60
900+4.218 = 69
950+4.419 = 74
1000+4.520 = 85
21 = 91
  • Measure the bellows of the camera
  • Look up the measurement for the appropriate lens on the above scale
  • Overexpose by the stops given.
  • If the exposure is over 1 second look this up on the reciprocity scale and expose for the given value.
Reciprocity scales vary from film to film with a little more insight into it being available over at Landscape Photography Blog

Summary

             I enjoyed the short time we had with the large format camera in the studio set up and look forward to further adventures to explore it's capabilities but I've come to realise it is a branch of photography that deserves your utmost attention if you are to achieve the desired results, as mistakes can be expensive, but the rewards can be exceptional.


                                                            Scanned 5" x 4" lfc neg        


                                                         Scanned 5" x 4" lfc neg inverted 


                                                                         Basic studio set up 


       Large format cameras are still used in a lot of studio work because of the quality of image they can produce and are still used in architectural photography for their ability to deal with converging lines. As I final point I've just chosen to include a link that is quite handy for all the necessary formulas and a couple of other pointers over at Ken Rockwell's place. 

Cyanotypes

            John Herschel (1792 -1871) was an astronomer who is credited as being the man that developed the cyanotype (blueprint) process after trying to find a suitable way to copy his notes.  He initially found that the early papers that were coated with iron salts and used in contact printing could be fixed using hyposulphite of soda, and then eventually the paper would then be washed in water and would in turn produce a white image on a blue background. Herschel was apparently also the man that gave us the words photography, negative,positive and snapshot.


                                                         Herschels 'Lady With Harp'


                In 1843, a British botanist Anna Atkins (1799 - 1871), became the first person to use cyanotypes to photographically illustrate a book that she had also produced. Her book of ferns from 1843 meant she became a figure of note in photographic history as she is now recognised as being the first person to produce a book using photographic prints. Anna's images were also known as shadowgraphs as they were produced by laying the ferns directly onto the sensitised paper prior to being exposed in the naturally available UV light (sunshine).


                                               Atkins 'Asplenium Marinium' 1853 

                     There is another image of note from an American artist called Henry Bosse that was printed in 1853 and is held in the National Museum of American Art called Mouth of the St. Croix River . Now I know how the basics of cyanotypes works but what fascinates me about this image is simply the way he has managed to capture a landscape in such wonderful detail, especially for the time it was produced although I can't say for sure whether this is the original or  a retouched image for the benefit of the viewer.


                                                           Producing Cyanotypes

  • knowledge of COSHH data sheet 
  • ammonium ferric citrate
  • potassium ferricyanide
  • distilled water
  • water-colour paper  
  • chinese brush
  • light-tight container
  • ohp acetate
  • cheap glass clip frame    

1/ Mix equal parts (25g) ammonium ferric citrate and potassium ferricyanide with 100mls of distilled water each.

2/ Mix both solutions together and keep in light tight container until ready to use, this is your sensitiser.

3/ Lay out a sheet of water-colour paper and try and ensure you keep it free from greasy finger prints and the like, apply a minimal amount of sensitiser to your brush and make sure you don't saturate it as you only need to apply a thin coat of sensitiser in even strokes onto the paper.

4/ Put the paper to dry in a dark drawer as will now be light sensitive.

5/ Using photoshop, find a suitable image that doesn't contain too many dark shadows or blown highlights and invert the image so that it resembles a negative.

6/ Print this image onto a sheet of OHP acetate making sure you print onto the rough side so that he ink sticks.

7/ When both the sensitised paper and acetate are dry, place the paper face up on the backing board of the frame, then the acetate on top and lastly the glass and clip it up to prevent it moving.

8/ Place outside in direct sunlight for around 5 minutes, you should be able to see the yellow turn a deeper green/blue but don't worry if you don't have bright sunshine as it will just require a longer exposure and if its raining a UV sunlamp will do the job although it may take around 50 minutes .

9/ Final thing to do is unclip and rinse the paper in cold water to remove the solution and prevent it from continuing to develop, this may take a couple of rinses but you should see all the yellow disappear and a nice blue print as a final result.

10/ Leave to dry .

                                                                    Results


For my first attempt I used a macro image of a decaying leaf as I thought it might produce some interesting results but instead it was left over exposed and so just became a blue/black abstract that wasn't even worthy of scanning but as I said, it was a first attempt so I thought I'd give it another go with a simpler floral image which you can see below.

                                                      
           Maybe not the most interesting of results but it did show the detail in the petals although I feel the background could have been with being a bit lighter. For my third attempt I used an old image I'd taken in Copenhagen as I thought it might work well but again I feel that it has too many shadows and highlights and my research I have done since, suggests that you should look for an image with less severe contrasts for better results.


         Now I don't mind cyanotypes but I'm sort of in the mindset that unless the image chosen is spot on, then I could soon be bored of these blueprints and with this in mind I set out to see about what else could be done with them, which  is when I came across the idea of tea staining them. For this I just made a gentle bleach solution and washed the cyanotype in it brushing the deeper bits with my fingers to speed it up, I then rinsed it off and put it into a dish with boiling water and 6 teabags ...the tea doesn't have to be boiling, it's just I'm very impatient at times, then take it out and leave it to dry. I must also point out I couldn't wait for this bit either so I stuck it in the oven to dry a bit quicker and the result is below, but just try and ignore the fact he's walking the other way because I flipped the above image when I realised it looked better with the acetate on the left. 


                                                              Conclusion

           Choose images with less of a severe contrast, be careful of over exposing, don't brush completely to the end of the sheet as it gives a much better effect if you can see the brush strokes on the edge of the frame and finally continue to experiment with things like tea to achieve a different set of results.
     

Thursday 27 June 2013

Typologies - The New Topographics


                    Today's class with Richard was split between studying a selection of photographers who had chosen to adapt the topographical form of photography, before being set our mission, which, if we chose to accept it, would mean that 11 of us would be returning to the classroom with our very own interpretations of the wonderful world of topography. 
So what exactly is topographical style and who are those that should be held responsible for our quest in the sunshine.....and whilst I'm at it.... are there others that worship at it's alter and what are their names ?
Topography is quite simply the study of surface and shape of geometric forms and typology is just the study of types of things so armed with that knowledge you can draw up some kind of conclusion that the topographical style of photography should give you an end result of a selection of images based around a repetitive theme which some may consider dull, clinical,simplistic or banal, maybe even lacking emotion, just as long as the final series appear to be some what interconnected if only by their apparent randomness.                                                                                   

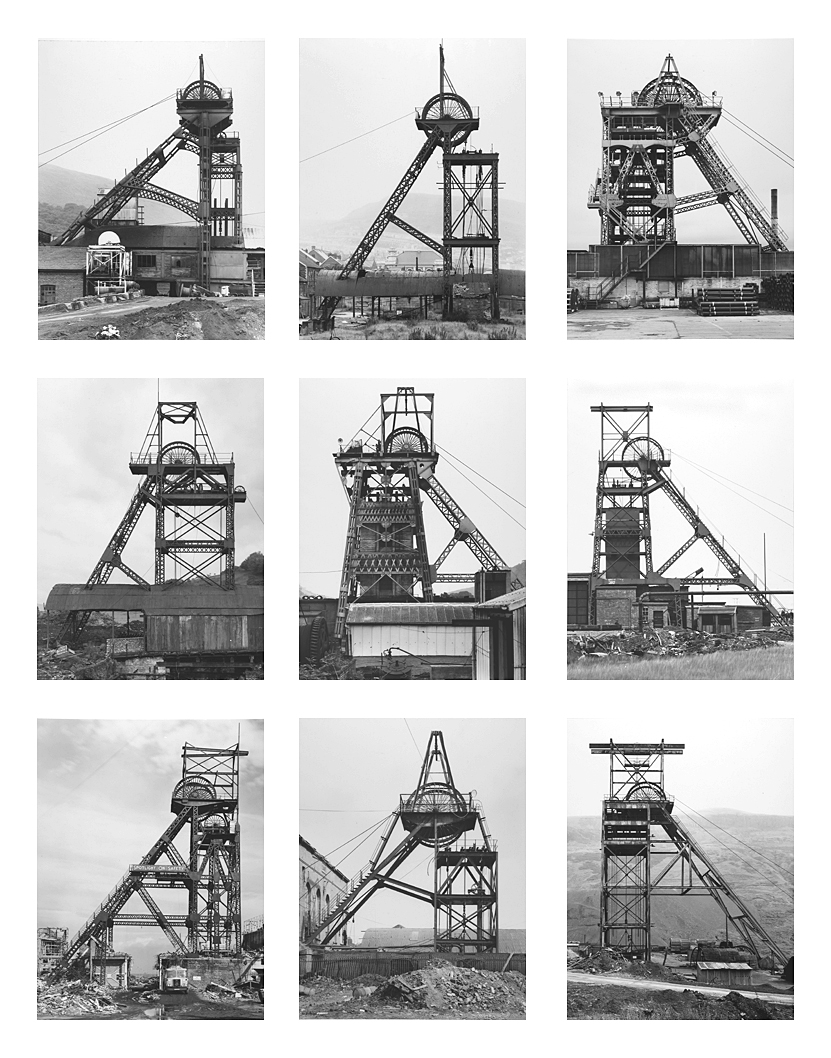
Bernd and Hilla Becher were both born in Germany in the early 1930s, where as a child Bernd grew up witnessing a landscape punctured by the buildings of the German iron and coal  industries but by their teens they were both living in a country devasted by the after effects of WWII. With this in mind, when it came to photography, they chose to document the industrial buildings of their childhoods that were still standing, as fine examples of what was good and strong about pre-Nazi Germany, and then proceeded to present them in a kind of catalogue fashion which they referred to as typologies. It wasn't just pit heads though as they went on to including cooling towers, blast furnaces and gas tanks amongst their chosen subject matter which they often displayed in the form of a large grid. Their particular style meant that they would shoot their subject matter head on and from a viewpoint that could be considered non political as they presented them in such a way that they were seen to be looking neither up or down at the structures. It should also be noted that their work wasn't restricted to the confines of their homeland as they have produced series of works from not only America but also Wales and England as can be seen below with a selection of their winding gear images.


                  The Bechers also taught at the Dusseldorf Art Academy in the 1970s, influencing many of their students including Andreas Gursky, Thomas Ruff, Thomas Struth and Candida Höfer, in what has come to be commonly known as the Dusseldorf School Of Photography  . They were also invited to attend an exhibition called New Topographics: Photographs of a Man-Altered Landscape  in 1975, featuring Stephen Shore along side a selected few others.

                         A final example I'd like to insert as an example of the topographical style, would be the work of Donovan Wylie and in particular his series The Maze which brings together a collection of images that some may consider repetitive and mundane but none the less they still act as a catalogue of images that best represent just what it would have been like to have been an occupant .  


                   Now armed with the above information we were asked to go and explore the environment in and around the college grounds and produce a series of images that could sit together as a fair representation of the topographical style of photography and so with this in mind I came up with The Adopted Offspring of Mr & Mrs Birch   


                        For further reading and examples of the work of Bernd & Hilla Becher, there are a couple of books mentioned over at Luminous Lint  which are should be worth checking out.